
Why Should You Use Back Strengthening Exercises?
Today we’re going to start talking about Lower back exercises.
Firstly, let’s quickly look at the difference between what we’re trying to achieve with stretching and strengthening. When stretching, we’re trying to mobilize structures by freeing up your tissue and joints.
Now, with strengthening we’re actually stabilizing the joints to offer a bit more strength and support to the back.
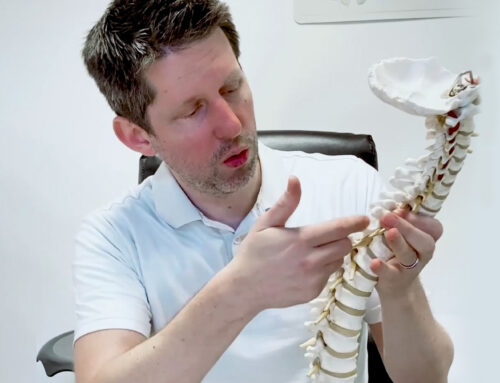
The low back doesn’t just consist of the bottom vertebrae. It will include structures like where the pelvis meets the sacrum, the sacrum itself, coccyx, the hips and a lot of the tissue joining into the the spine. These will all have an impact on lower back pain.
It’s worth noting that it’s not just the vertebrae, disks and nerves that create back pain symptoms – which is why we need to take all of these into consideration.
To help you strengthen your back, we’re going to run through 6 basic, fairly straightforward exercises and then we can look at progressing these further on if we need to.
The Exercises
1. Breathing Exercises
First of all, we’re going to look at some breathing exercises. A key part of your core is actually your diaphragm. Making sure that we’re using this correctly is vital.
We often breathe with accessory muscles. So we tend to fill up the top of the lungs when breathing. We don’t usually breathe deep into the lungs and often with the way society is, we want to tuck our stomach in. We don’t want to the let the stomach relax out. So actually, the first thing we have to practice is breathing through the stomach.

- Lie on the floor on your front
- Place your hands onto the curve of your back
- Take a nice deep breath in with the intention of filling your stomach with air so it raises you lower back (your stomach won’t actually fill with air, but this is what it should feel like)
- With each breath, either hold it at the top for a few seconds or simply breathe in and slowly breathe out.
2. The Dead Bug (Lower Abdominals)
This exercise is going to target the lower part of your abdominals.
Strengthening your lower abdominals is key to providing natural support for your lower back – and abdominal weakness is something we see in a lot of our patients.
A great exercise for this is “The Dead Bug” and it comes in 2 parts

Part 1
- To start lie on your back with your knees bent and feet on the floor
- Slip your hands under the lower part of your back – you should feel your fingertips meet
- Now from this position, you want to practise flattening the spine onto your hands and holding it for 30 seconds. Remember, you should not be using your feet to push down. It’s more a case of rocking the pelvis to put pressure onto the hands

Part 2
- From the same position as step 1, place pressure onto your hands
- While holding this pressure raise your knee up, keeping it at a 90 degree angle
- Hold this position while keeping pressure on your hands for about 30 seconds
- Lower you leg down and repeat on the other side
3. Glute Bridge
Now we move onto the Glute Bridge Exercise. As many of us tend to live fairly sedentary lives, we spend a lot of time sitting! Naturally, we’ll have a tendency to curve down and shorten a lot of the muscles on the front quite easily.
We forget about the fact that the posterior muscles and the glutes also need to be strengthened. And a lot of the time, a lack of strength in the posterior part of the spine and the glutes can be a big cause of lower back pain and certainly, instability.

- We’re going to get onto our back with our knees bent and feet on the ground
- Place your hands on the floor either side of your body
- Now, very simply you’re going to raise your pelvis up and hold this position for about 30 seconds
- After 30 seconds, slowly lower your pelvis down. As you lower down, try to get 1 vertebrae at a time to press on the ground
4. Side Plank
The next one is a side plank. We’ve got to remember that we’ve been working the front and back muscles – so now we need to look at strengthening our sides.

- Your starting point will be pivoting on the knees. So knees bent and onto the elbow (keeping it directly underneath your shoulder)
- Now, pivoting on the knees, raise your body while keeping it in a nice straight line
- From here, looking straight ahead hold this position for 30 seconds and then lower back down
- Repeat this movement on the other side
5. Lying Superman
Moving on, we’ll look at working on more posterior strength using an exercise called “the prone (lying) superman”.

- To begin lie down on the floor on your front with your hands down by your sides
- From here, you want to raise your body off the floor by rotating and raising your thumbs towards the ceiling and lifting your legs and upper body while looking forward
- Hold this for about 30 seconds, however do not overdo this exercise. If it hurts, STOP. This is not a “No pain, no gain” scenario
6. The Bird Dog
We’ll continue to focus on the posterior muscles by working on the extensor muscles. This brings us onto the Bird Dog exercise.

- Starting off, we want to make sure your position is correct. Begin by getting onto all fours and relax your shoulders down while maintaining a slight curve in your lower back. This position should remain the same throughout the exercise
- Maintaining this position, we’re going to bring 1 arm up out in front of us
- Now lower this arm and move onto raising and lowering your opposite arm
- Now, raise one of your legs straight up behind and then bring it back down
- Alternate onto the next leg, raising it up and then lowering it down
- Eventually you can progress to raising one arm and the opposite leg at the same time, repeating this movement on each side
7. Stand From Sitting + Squat Prep
A squat is an incredibly functional exercise for strengthening your lower back. One of the main versions of a squat we run through with people is standing from sitting. It sounds straightforward, but when you try to get it done with proper technique – it can be quite tricky.
So certainly for beginners, it’s worth giving this a go and is a good progression to start working on a squat technique.

- Start off by sitting on a chair or a stool
- Sitting upright, we’re going to create a bit of a curve into the back. Not too much. Not too little. We’re also going to open up the chest. We don’t want to be slouching or hunched over forward for this exercise
- From here, keeping your legs shoulder width apart we want a 90 degree angle in the knees and the ankle right underneath the knee
- In a controlled motion keeping your knees stable and maintaining your back posture, stand up slowly with any movement coming from your hip
- After coming up, you want to come back down to sitting in a controlled movement without collapsing your knees in
Reptitions, Form, Progression and Volume
If you find out you’re doing loads of these and they’re pretty easy, then you can start progressing from a lot of these exercises. In terms of how often you do it, it depends a lot on the condition, how you’re feeling and how you’re responding to it. If you feel pretty well from it and you don’t feel tired, then you can always do it the next day or take a 1 day break and have another go.
But once again, the form is really important. Your technique is vital. And if you’re tired and you can’t maintain your form, it’s worth giving yourself a rest and making sure that you get it absolutely bang on.
Related Posts

The first step to owning your health
Unsure where to start or which practitioner to see? Book a Free 15 Minute Discovery Consultation to speak with one of our experts today.
15 minute consultations are about you. There’s no high pressure sales pitches, no catches or hidden fees & absolutely no obligation to book a treatment.

Associations


